
Over the years I have noticed that many families have a lot of anxiety over submitting applications. Totally understandable! It’s actually a very easy process but can be completely nerve-wracking at the same time.
It reminds me of a comment a pilot made to me once - that no matter how many flights he’s landed, he still gets a tiny bit anxious. I’ve helped submit probably 200 applications this month alone and I feel the same way! It’s a lot of pressure.

Before starting the process…
Step 1: Complete the application and ask a trusted adult to review it carefully! We do this with our clients, of course, but those working at home can pick up a copy of one of our application guides to help. Pro tip: the activities section is the most difficult part. If it’s not a little hard, you’re probably not doing it right. READ THE DIRECTIONS IN THE GUIDE!
Step 2: “Invite” any recommenders (teachers, counselor, parent for ED authorization, etc) through the “Recommenders and FERPA” tab. Again, we do this with all of our clients, typically at our early August college counseling meetings.
If any questions remain about Step #1 or Step #2, stop. Do not pass go. You are NOT ready to start submitting yet.
Let’s begin!
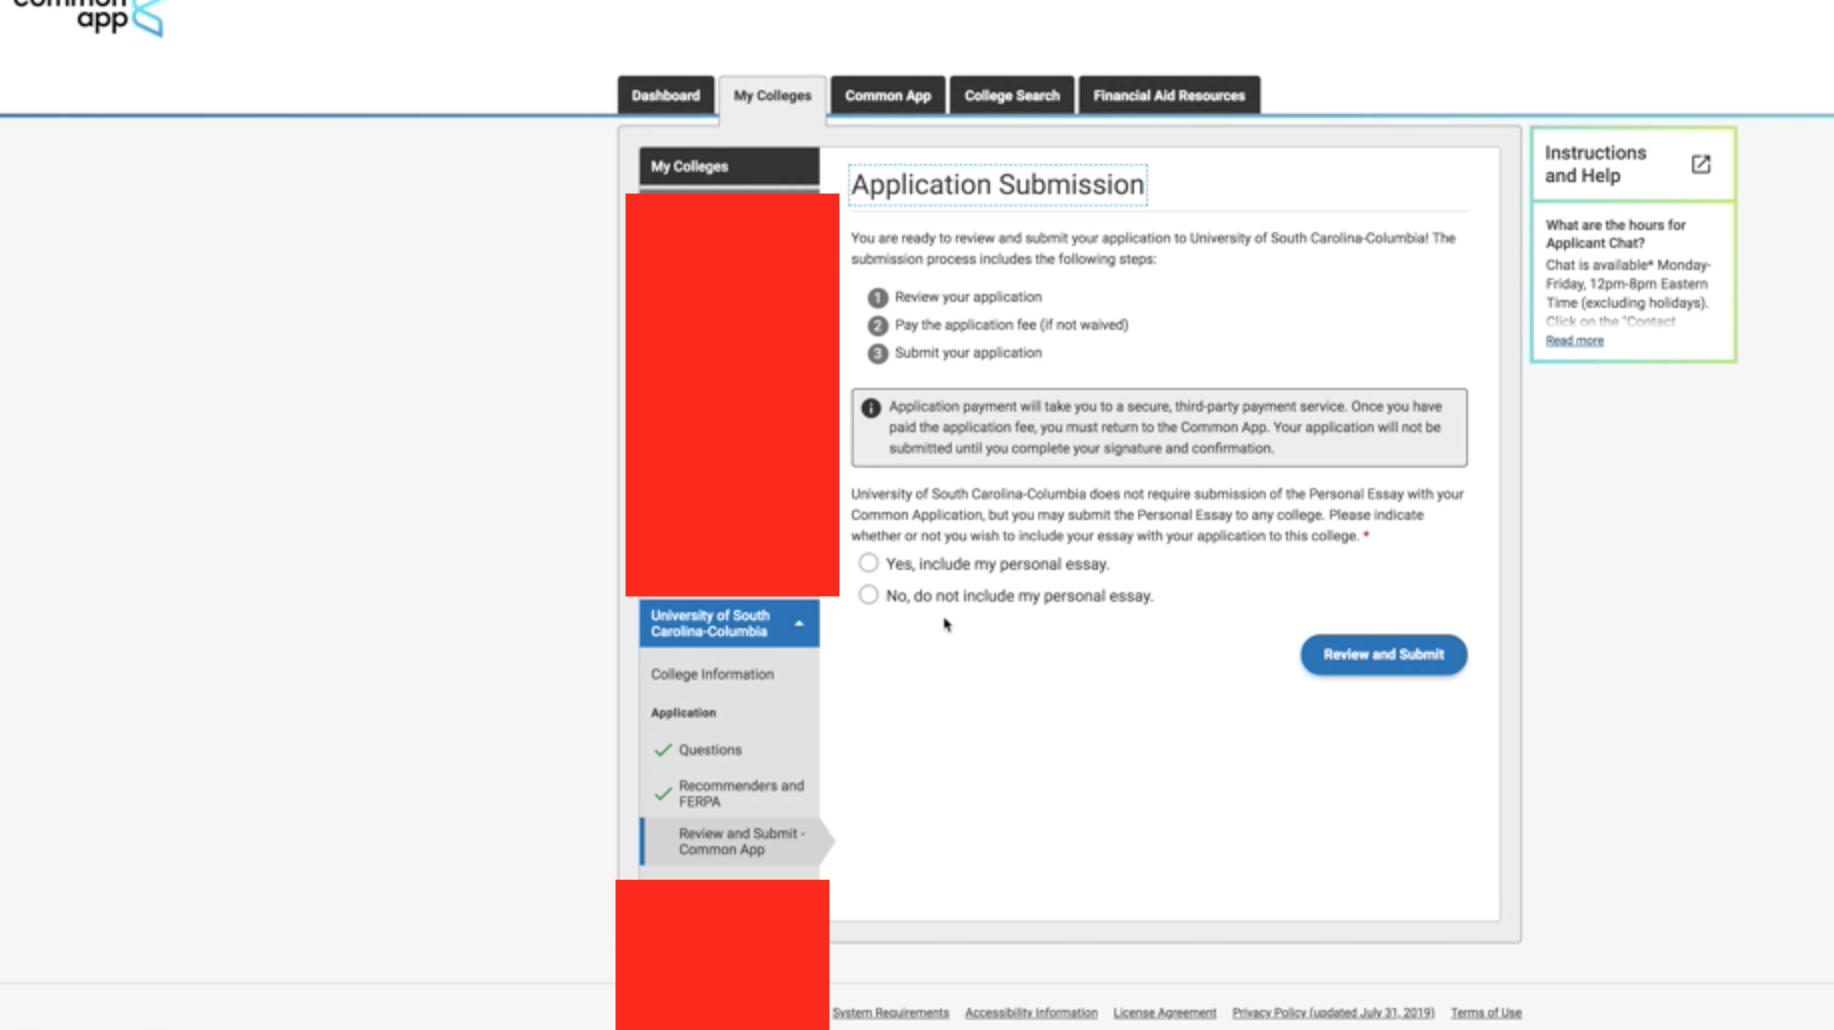
Step 3: Confirm that you have green check marks next to “Questions” and “Recommenders and FERPA” under the college’s name. If you don’t, there’s a problem with your completion of the initial steps and you weren’t ready to submit after all! Time to back up.
Step 4: Click “Review and Submit.”
THIS WILL NOT RESULT IN A SUBMITTED APPLICATION! I promise :) There is literally no possible way that you can submit this by accident.
Step 5: If the college does not require the Common App (R) essay, click “Yes, include my personal essay” unless you have a unique circumstance and are not doing so for a specific reason. Most colleges DO require the Common App (R) essay, so you won’t see this too often.
Step 6: Click “Review and Submit.”
Once again - you can’t submit by accident. I swear!
STARTING TO REVIEW
The next page that will come up is a PDF form of your Common Application (R).
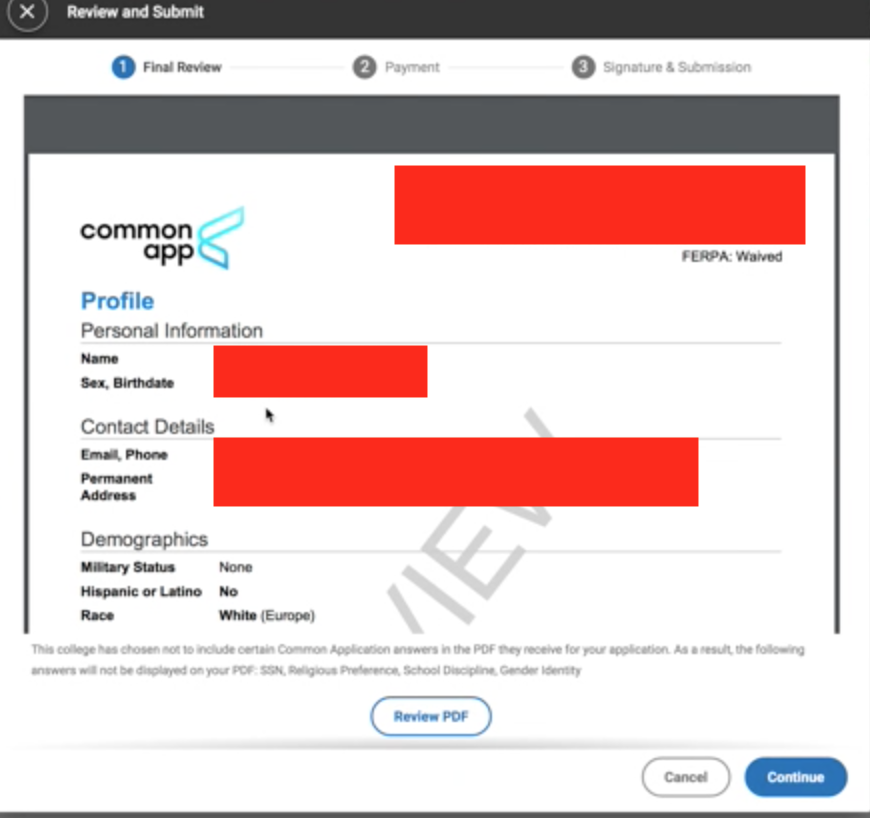
Step 7: Either scroll down in the screen or click “Review PDF” to open the PDF in a separate window.
For your first submission, I’d recommend clicking on the “Review PDF” button because you will likely have to go back to make tweaks as you review the PDF. If you stay within the main screen, you can’t go back to revise while keeping the PDF up for reference. You’ll have to complete Steps 4-6 again each time you correct an error.
If you like reviewing on paper, you may want to just go ahead and print the PDF. This is what I usually do.
When submitting additional applications, you can scroll down to the individual school supplemental pages since you will have already reviewed the main Common App that stays the same for each school. These usually begin on page 10 of the PDF document, but the length can vary depending on the answers to questions in the application.
I don’t usually click on “Review PDF” for submissions #2 and beyond because I rarely have to make changes after that point. Personal preference, I guess!
Step 8: After reviewing the entire document, click the blue “Continue” button on the lower right hand side of the page, as you can see on the photo above.
Step 9: A pop-up will appear with directions. The gist of it is that you’ll be redirected to a third party site to pay. You MUST NOT FORGET to return back to the Common App after paying, because paying and submitting are not the same thing!
(I told you that you wouldn’t submit by accident! Accidentally NOT submitting is a bigger risk!)

PAYING THE FEE
Step 10: Confirm that your name appears and click the grey “Next” box.

Step 11: Indicate that you will be paying with a credit card. If you’re paying with an electronic check, you’re on your own because I do not have a clue as to how to do that! Click the grey “Next” box.

Step 12: You will be able to enter your credit card information. BUT WAIT. Don’t enter anything yet..
TIME FOR MY TIP!
Step 13: Open a new window - a google document, a blank email, whatever.
Step 14: Type out the following information on separate lines:
Credit card number without spaces
Expiration month and year (any format is fine)
The name of the card holder as it appears on the card
The house number and street of the billing address (a.k.a. 131 Park Street NE)
The billing zip
The student’s email address
The student’s name
Step 15: Put both windows up side by side or at least have them next to each other.
COPY AND PASTE
Note: I did not include a screen shot for this page. There was so much personal information on it that it would not have been helpful once all of it was blocked out.
Step 15: Start copying and pasting the information over. First the CC#. The expiration month and year are in drop-down format but I like you to have it accessible anyway for reference. Name of the card holder. House # and Street. Select the state from the drop-down. Copy and paste the zip. Make sure “United States” is selected.
Step 16: Accept the CashNet Terms and conditions by checking a box and click “Next.”
Step 17: You will reach the page below. Copy and paste the student’s email address into the box. Click “Submit Payment.”
Step 18: You’ve paid! Great. Click “Return to Common Application (R).”
Remember, you have NOT submitted the application yet!

SUBMITTING! FINALLY!
Step 19: Read the boxes carefully and check them all.
Step 20: Type out your name in the “Signature” box and select the date. Click “Submit.”
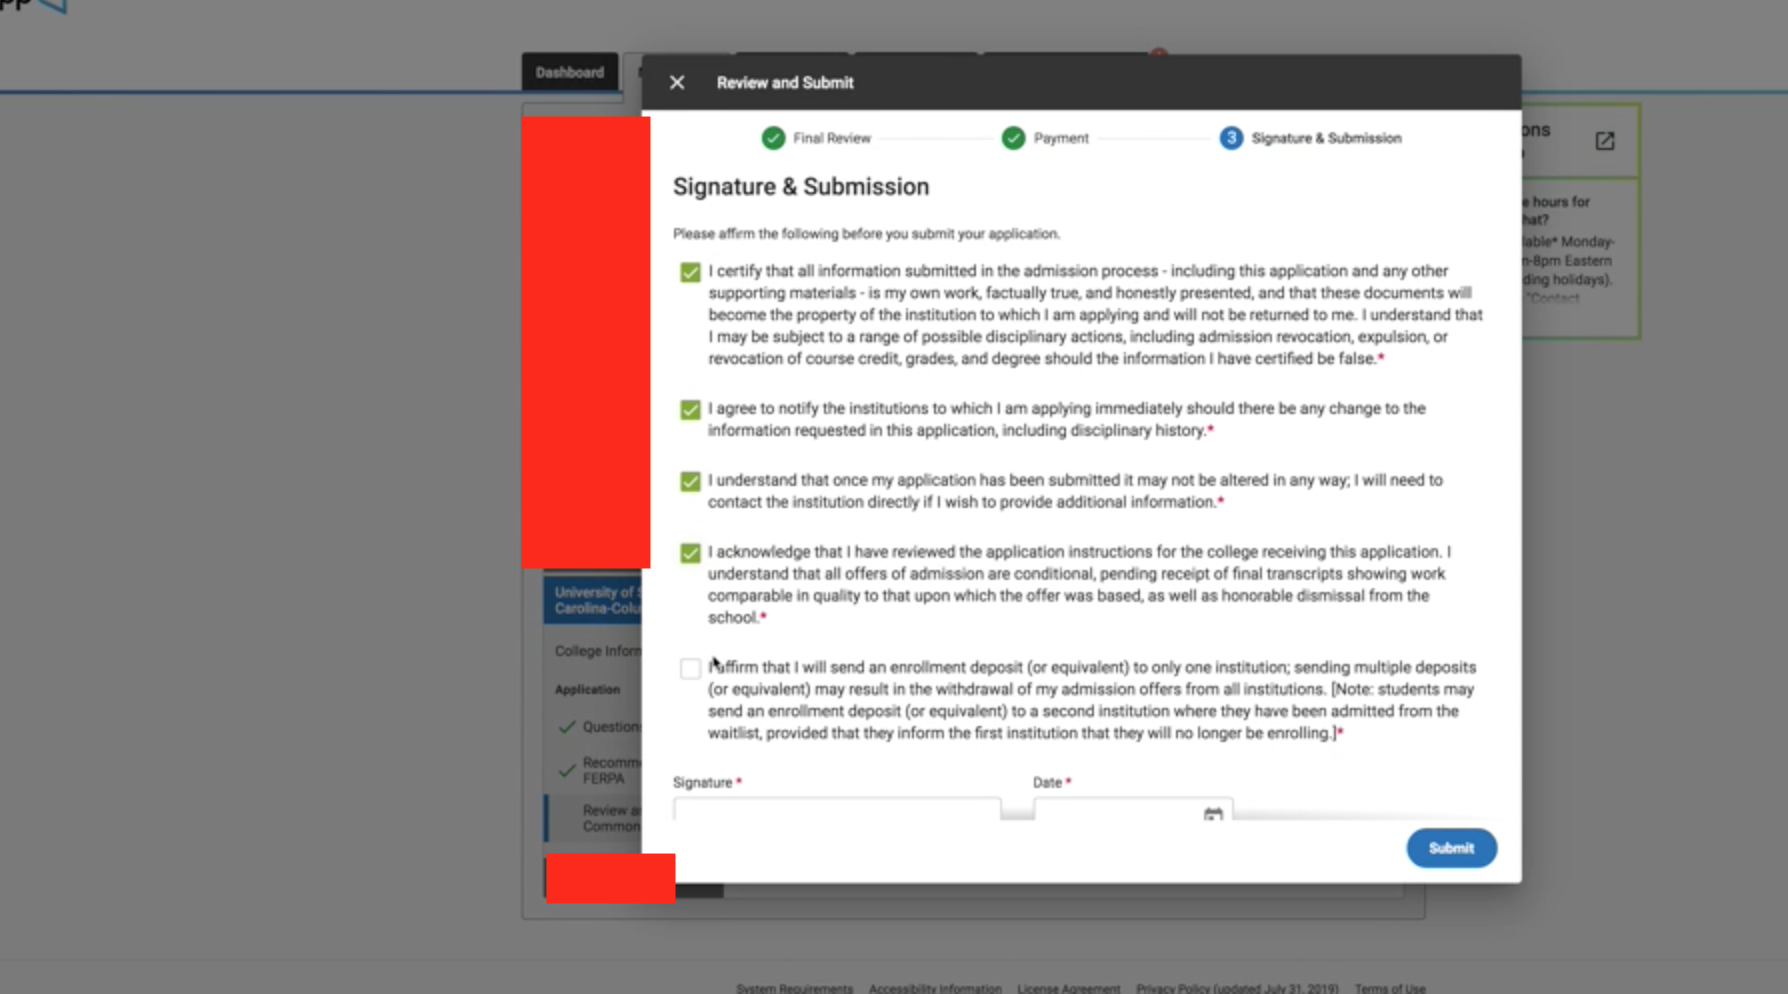
YAY! You have submitted. Enjoy the confetti! It’s new this year and makes me smile every time.
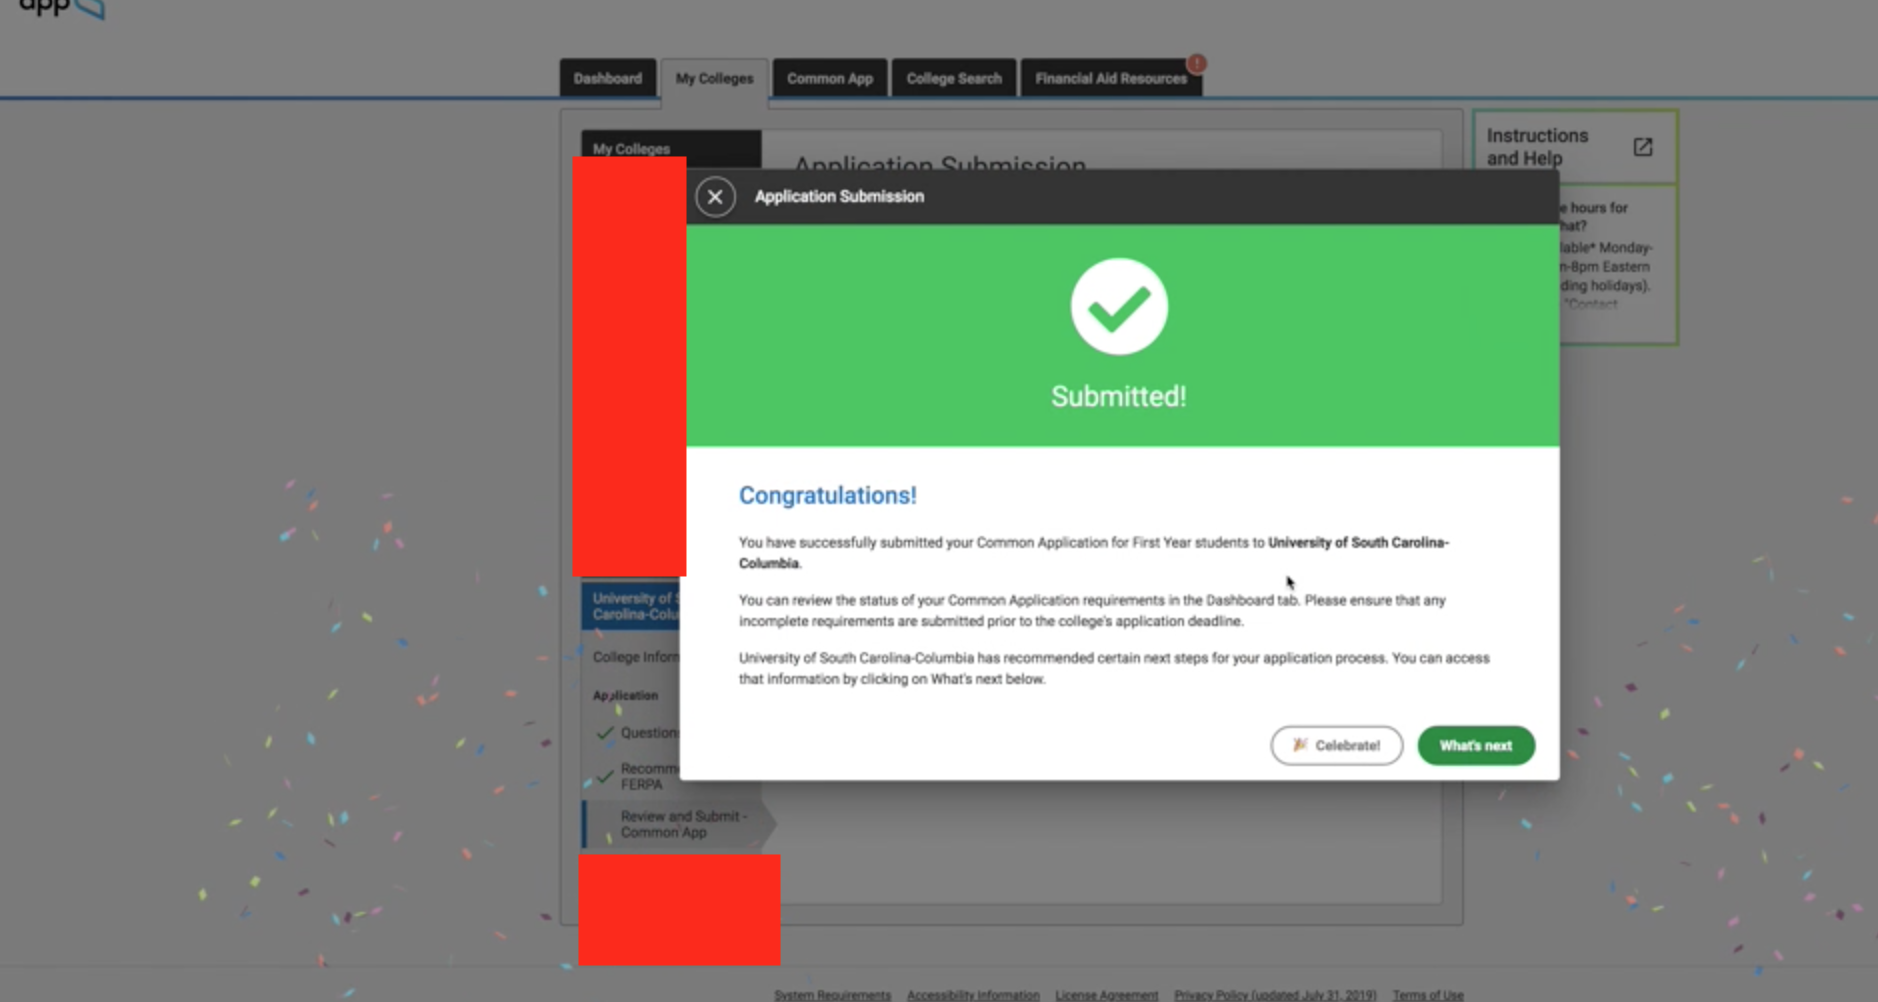
Step 21: Click “What’s Next” (after you have gotten your confetti fix - if you need more just keep clicking “Celebrate”!)
College specific information will typically come up that shares next steps in relation to that school’s portal.
More on the portals in another post!
STOP AND DOUBLE CHECK
Some schools have essays in separate writing supplements. There is no rhyme or reason why some schools do this and others don’t. Under where it says “Review and Submit Common App(R)” under the school name, confirm that there is no mention of a separate writing supplement. If there is, click on “Review and Submit” and repeat the process for that (minus the payment screen). This is EXTREMELY IMPORTANT.
AND… REPEAT!
This is fun the first time but gets old pretty quickly. You will thank me that you do not have to retype your credit card information in repeatedly. Just keep copying and pasting. This will save at least three minutes per application, which can add up if you’re submitting ten apps at the same time!
Check the Dashboard
When you’ve submitted your last application for the day, go back to the dashboard to confirm that each school is listed as having been submitted. You’re done!